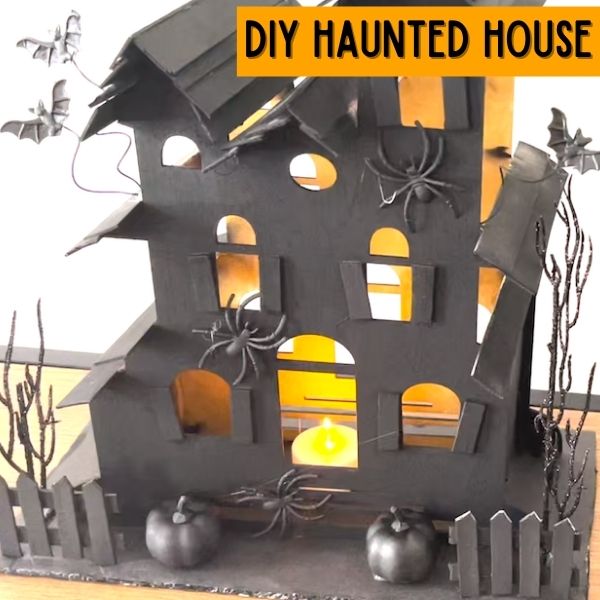
Knock, knock. Who BOOS there? This spooky dollar tree haunted house craft is easy to put together on the cheap! It’s a fun Halloween decor craft that will make your space festive. Haunted Halloween craft is versatile and will work for any Halloween theme…a farmhouse, whimsical, spooky, and more!
This spooky halloween haunted house with LED tea lights was inspired by a hand painted version at Pottery Barn. I love Dollar Tree for all the unfinished wood pieces in their seasonal and craft sections. After spotting Dollar Tree’s whimisical haunted house hanger in unfinished wood, I decided to make a Pottery Barn Haunted House dupe!
Follow along for the Dollar Tree Light Up Haunted House tutorial!
Dollar Tree Light Up Haunted House
Haunted House Materials
Dollar Tree Supplies
- Haunted House Door Hanger (2)
- Popsicle Sticks
- Tongue Depressors (wider popsicle sticks)
- LED tea lights
- Mini Bats
- Mini Spiders
- Black Foam Board
- Black/Glitter Floral
- Black acrylic paint
Other Supplies
- Black Chalk Spray Paint/Black Matte Spray Paint
- Gold Spray Paint
- Cardboard
- Floral wire or paper clips
Tools
- Scissors
- Hot Glue Gun
- Ruler
- Xacto Knife/Craft Knife
- Small Pliers
How to Make a Cardboard Haunted House from Dollar Tree – Step by Step Directions
Step 1: Paint
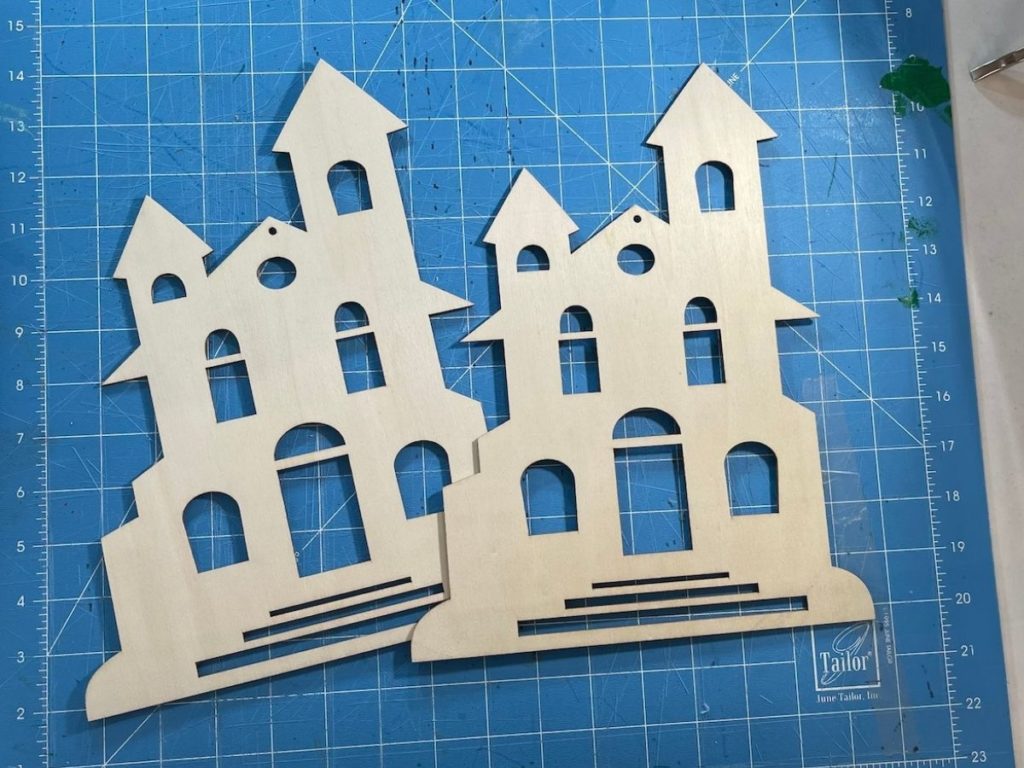
Paint the inside of the haunted house using the gold spray paint. Lay the haunted house flat on top of a protective covering. Make sure that both houses will be aligned with matching windows and roof tops before painting.
Step 2: Cut the Tips Off the Wide Popsicle Sticks
While the inside of the haunted houses are drying, it’s time to prepare the roof top!
The wide popsicle sticks will be used to make the roof of the haunted house. I like the look of the straight edge instead of the rounded popsicle stick. I used sharp scissor to trim the rounded edge off the popsicle sticks.
Step 3: Cut the Popsicle Sticks into Shutters
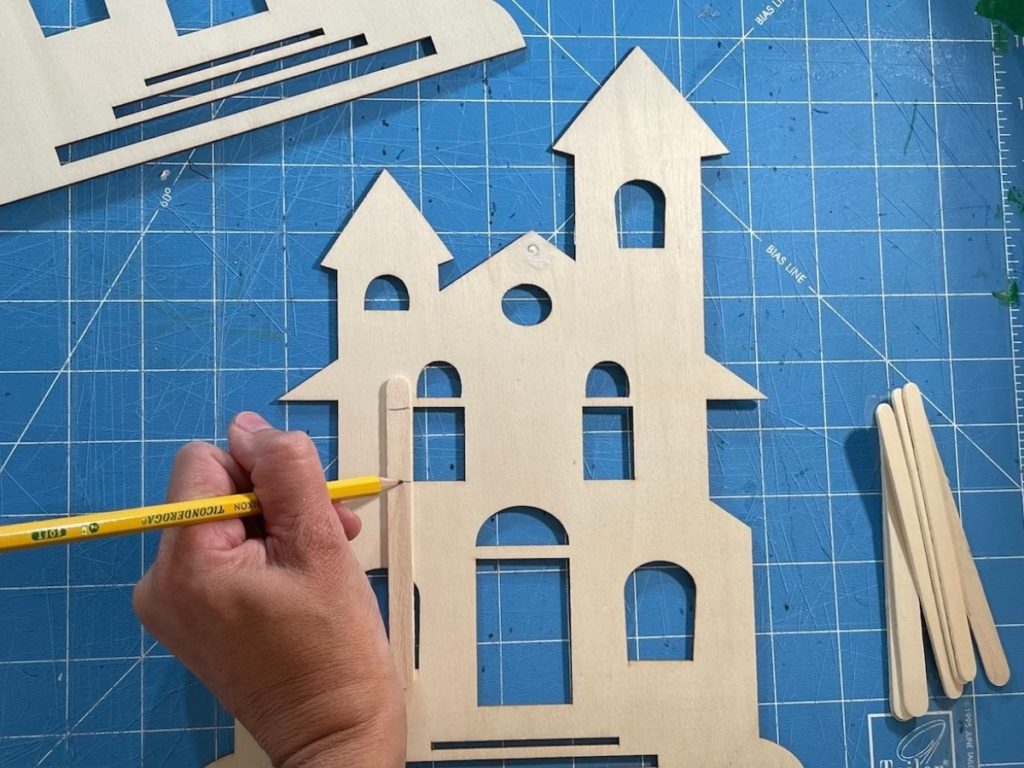
Measure shutters for each window on the haunted house. Cut the popsicle sticks to size. Then glue the shutters to the haunted house. I like the shutters to look a slightly crooked to add a little spooky character!
Step 4: Add Cardboard Sides of the Haunted House
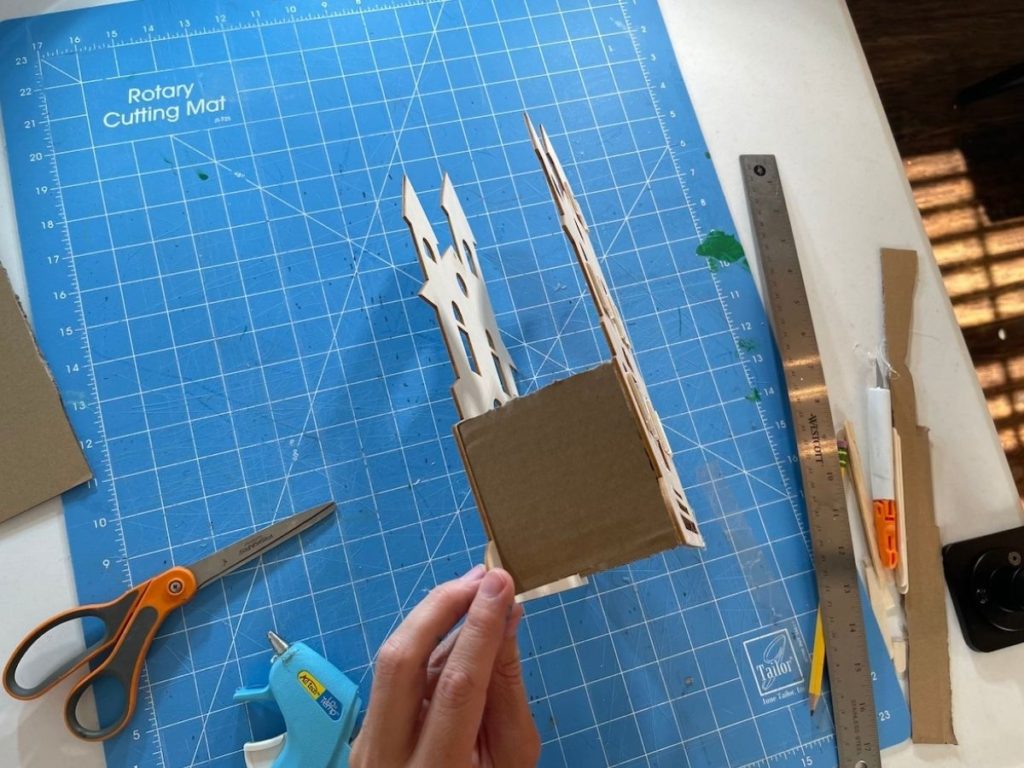
The cardboard sides will form walls on the bottom side of the house on each side.
Cut 2 pieces of cardboard approximately 3 inches wide and 4 inches long.
The cardboard should be about 1/8 of an inch from the bottom of the house. (We are leaving a little room at the bottom to hot glue the house onto the black foam board.)
Glue 1 cardboard piece to the left inside (gold side) of the front haunted house and the back haunted house.
Glue the second piece of cardboard onto the right side.
Step 5: Glue on the Roof Top
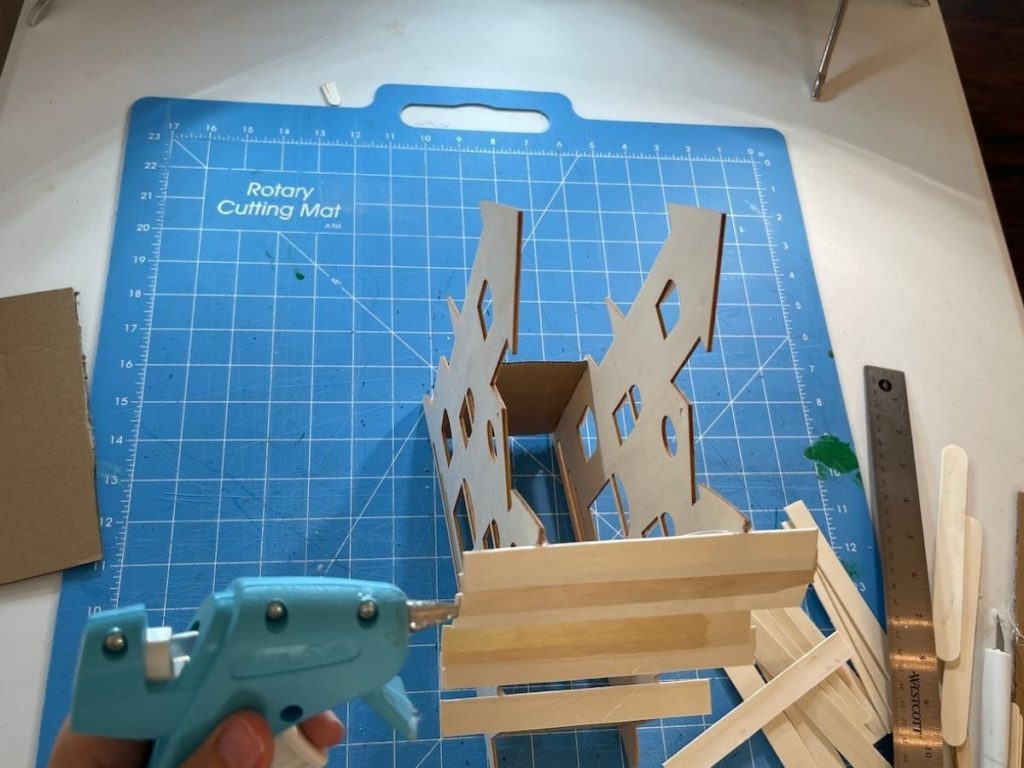
To create the roof, take the wide popsicle sticks and start from the outer part of the roof gluing one piece at a time until you reach the top.
When you get to the center of the highest roof top, use 2 regular popsicle sticks to make a right angle. Then hot glue that piece on top to make the roof top line.
Step 6: Paint
Place a protective cover down and then set your haunted house on top. Cover the inside of the house with newspaper, trash bag, etc so that the black paint won’t cover the gold.
Spray the haunted house top to bottom and side to side with the black spray paint.
OPTIONAL: If you don’t have black spray paint, then you may opt to paint the house with a brush and black acrylic paint!
Step 7: Create the Base of the House
The Pottery Barn Haunted House luminary has a base that the house sits on along with a decorative fence, pumpkins, and trees.
To make the base of your haunted house, cut a piece of foam board 7 inches wide by 9 inches long.
Use an xacto knife or craft knife to cut the foam board. Then paint the edges of the foam board black.
OPTIONAL: If you don’t have foam board, then you could also use cardboard.
Step 8: Attach the Haunted House to the Base
Attach the haunted house to the black foam board by placing the house in the middle of the board. I used my ruler to measure out where to best place the house.
You may want to leave more room in the front of the house to add decorations.
Place the house on the foam board, and use a pencil to trace a line for the front and back of the house. Then use the xacto knife to cut each line.
Slide the bottom edge of the front and back of the house into the cut lines to secure the house in place. You may want to use hot glue as well!
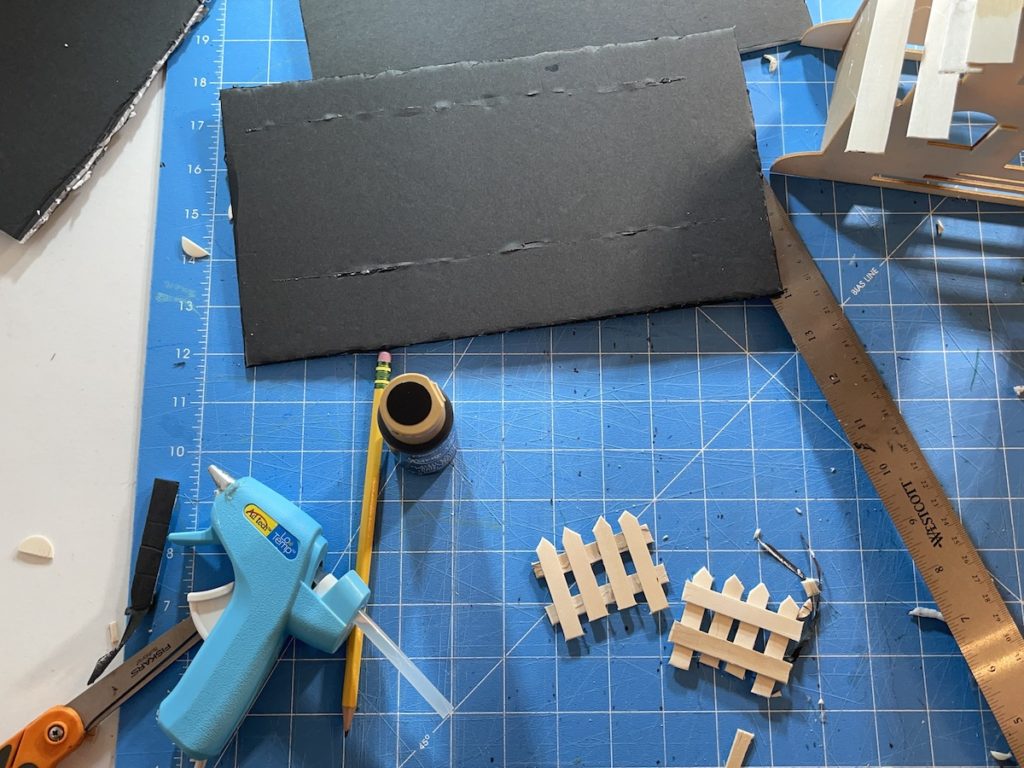
Step 9: Create the Fence
Build a mini fence for the haunted house by using the regular size popsicles!
Decide how long you want the fence to be and where you want it to go on black foam board. I decided to create 2 separate fences on each corner of the front of the house.
Cut popsicle sticks into 3″ pieces to create the fence pickets. You can leave these pieces straight across at the top or cut them to an angle for more dimension.
Place 2 popsicle sticks vertically on a flat surface. Glue the first and last fence picket so that they are slightly longer than the other pickets. This will allow you to attach the fence to the foam board the same way you did for the house.
Then glue the fence pickets into place leaving a small gap between each picket.
Paint the fence black on both sides.
When dry, trace a line for the beginning picket and the last picket onto the foam board. Use the xacto knife to cut the line. Then slide the fence pickets into place. You may also want to use hot glue for a more secure fit.
Step 10: Attach Mini Bats
Cut off any excess material attached to the bats. For example, if you have mini bats on a ring, just remove the ring so that you are left with only the bat.
Cut the wire (paper clips or floral wire) to size and hot glue the bats to the wire. Then hot glue the wire to the roof top of the house.
OPTIONAL: You can leave the wire straight or curl the wire to guide the bats in different directions.
Step 11: Decorate with Spooky Accessories
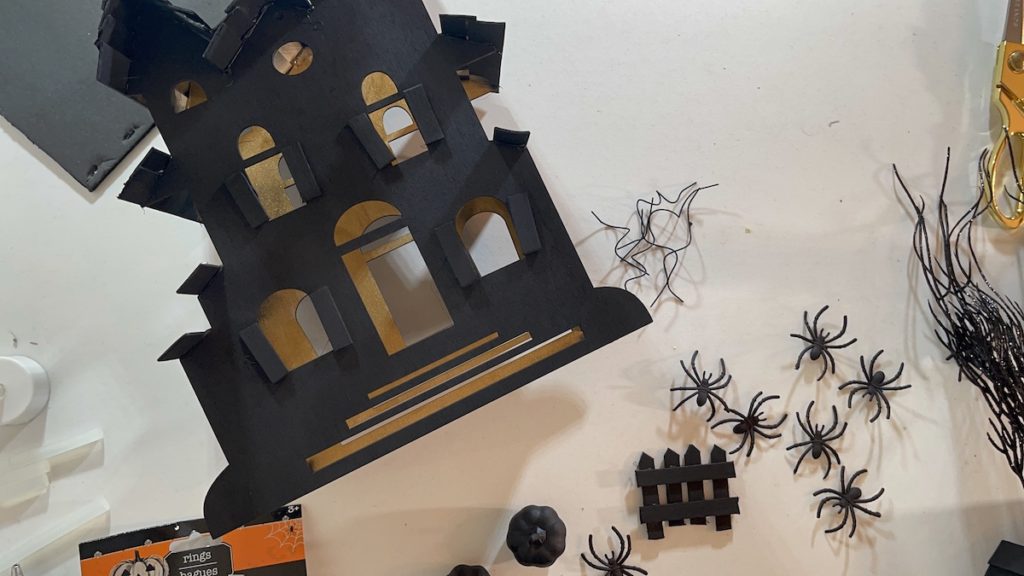
Dollar Tree has some really fun accessories that will make your Haunted House extra scary! Add mini cobwebs, spiders, black pumpkins, etc by simply hot gluing them onto the house! Last year I found a mini black cauldron at dollar tree that was so cute! It would look really fun outside the haunted house.
TIP: Check out the Halloween party supplies at Dollar Tree to find great mini items that you can use to decorate your haunted halloween mini house!
Step 12: Add the Tea Lights
Add the tea lights to the house by sliding them in through the front door. Dollar Tree has black and orange LED tea lights that would be perfect for this little project!
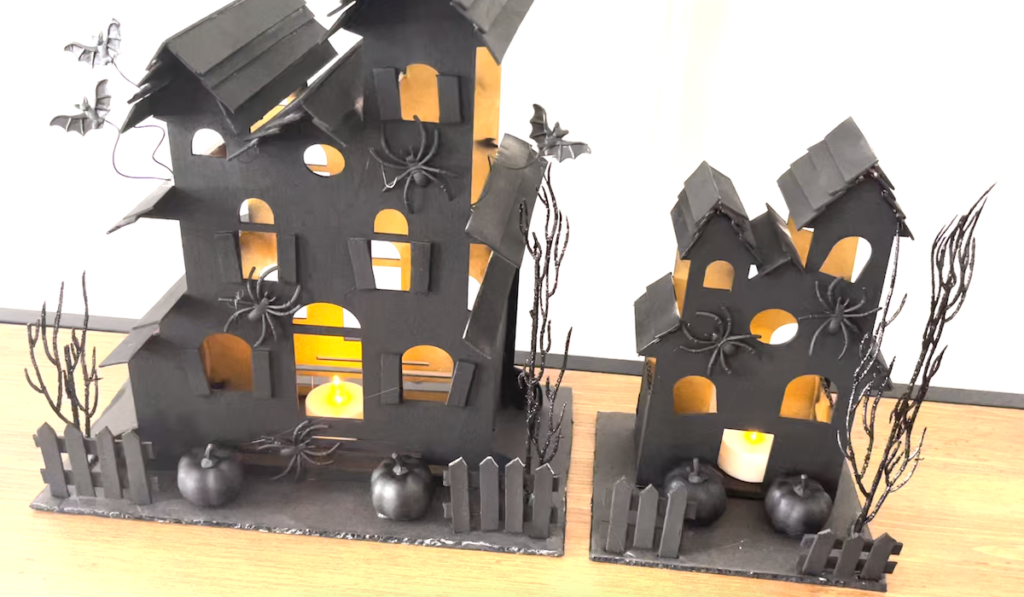
My kids LOVED helping me decorate this spooky house! It was a fun craft that we did together and then set them out for everyone to see.
I just found some smaller versions of the haunted house door hanger at Dollar Tree. So I grabbed 2 more and we are creating a little Haunted House village. I love that these are smaller so it creates a nice table scape!
You can grab some, too and follow the same directions to create your own little Haunted House village!