

Dollar Tree is a crafter’s dream when it comes to creating DIY Christmas decorations! You can find everything from paintbrushes to turn into the cutest Santa ornaments to real crafting supplies like foam board, paint, and even mod podge. The best part, the supplies are only a dollar!
Christmas is my favorite season to create cheap diy holiday decorations that are beautiful!
You will find a step by step tutorial on how to make this Christmas tree project made with materials found at the Dollar Tree!
Table of Contents
Christmas Tree Project Materials
You will need the following items to create your own Christmas tree craft!
Dollar Store Items
- Brown Craft Paper (Back of Tree)
- Wood Skewers
- Foam Board
- Mod Podge
Items from other stores
- Card stock (Front of Tree. I purchased mine from Hobby Lobby for $1 per sheet)
- Wood Slices (I purchased mine for a total of $2.50 from Hobby Lobby. You could also cut your own at home.)
- Multi-purpose paint (Choose a color that coordinates with your card stock paper)
Christmas Tree Project Tools
- Scissors
- Pencil
- Exacto Knife
- Ruler
- Paint Brush
- Heavy Duty Scissors or Wire cutters to cut through wood skewer.
Step 1: Pick a Christmas Tree Printable
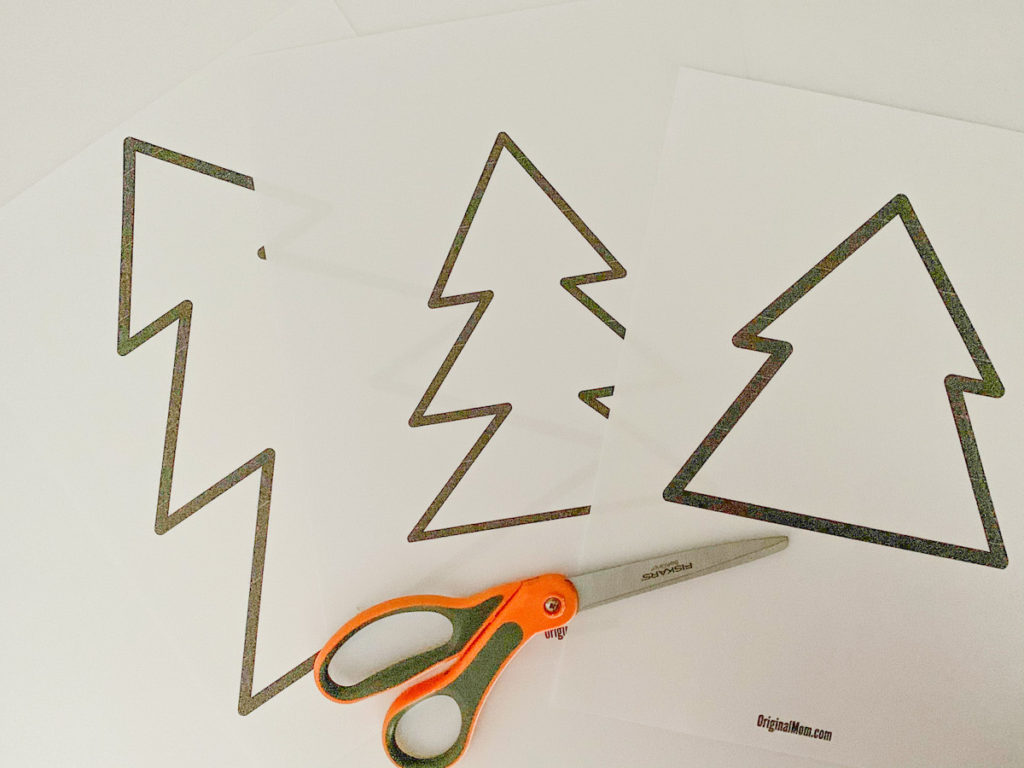
You can download 3 different sizes and shapes of Christmas trees for your Christmas tree landscape. For my final project I used 2 of the small wide Christmas tree printables, 2 large Christmas tree printables, and 1 medium sized Christmas tree outline printable. You can grab your free printable Christmas tree outline pdf by clicking the button below.
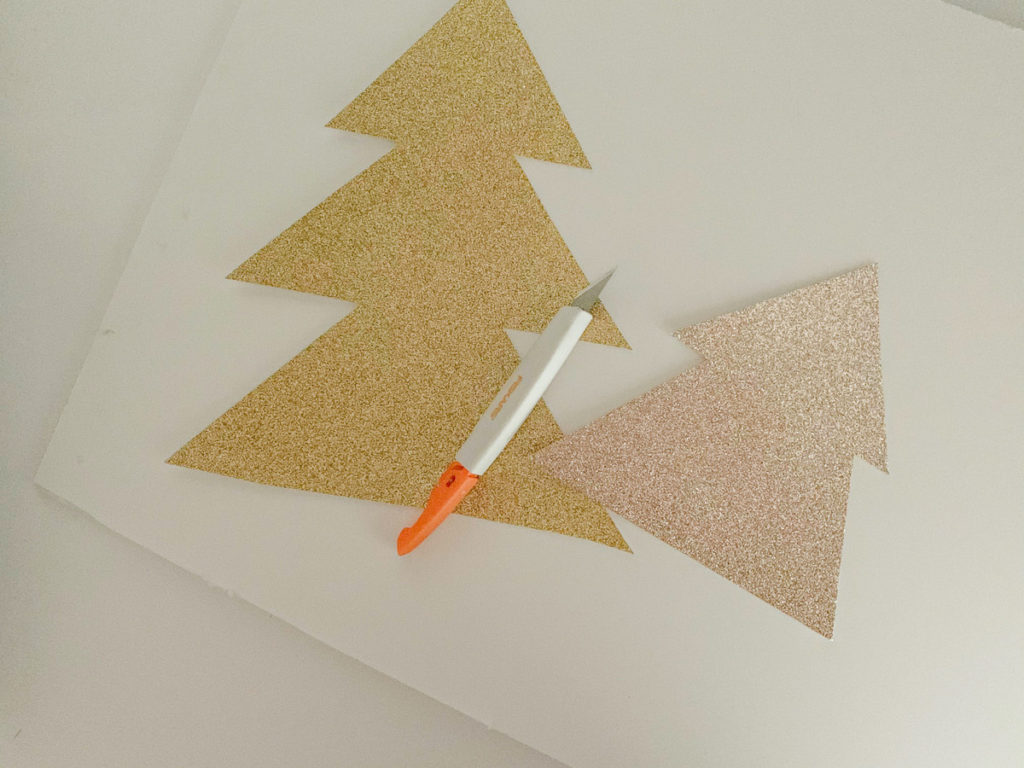
Step 2: Cut Out the Christmas Tree Outline Template
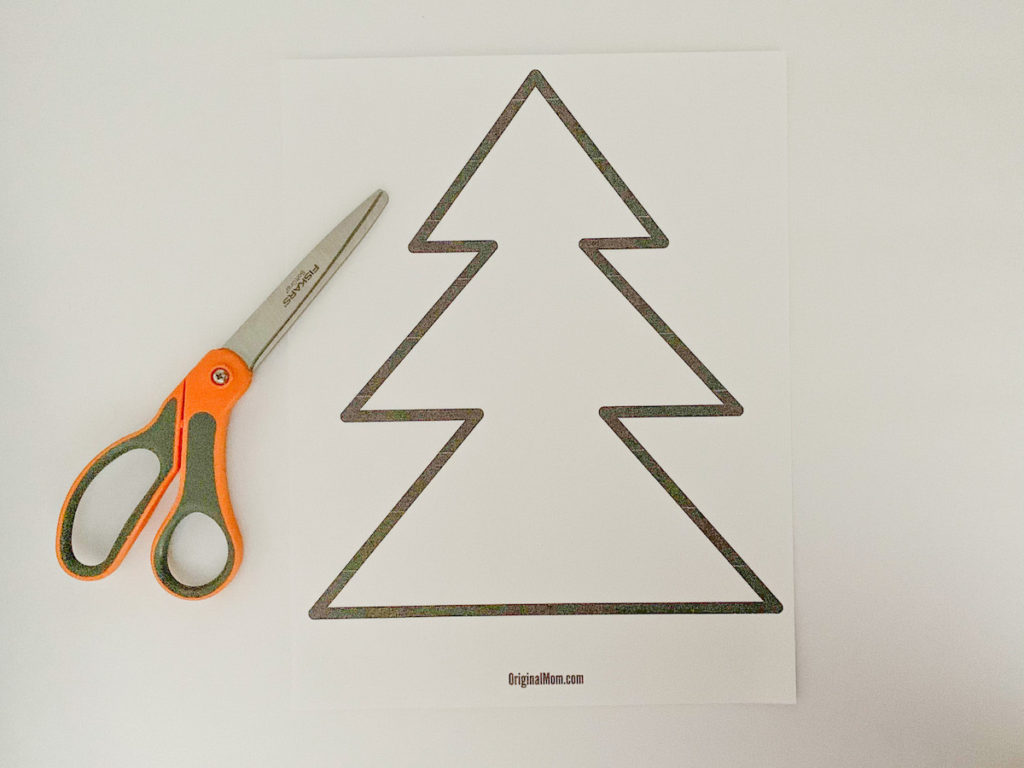
Create a template by cutting out the Christmas tree printable. Just use scissors to cut the template. I like to cut outside of the black line to make the Christmas tree template a little wider. If you want a smaller width cut inside the black line.
Step 3: Pick Out Festive Card Stock Paper
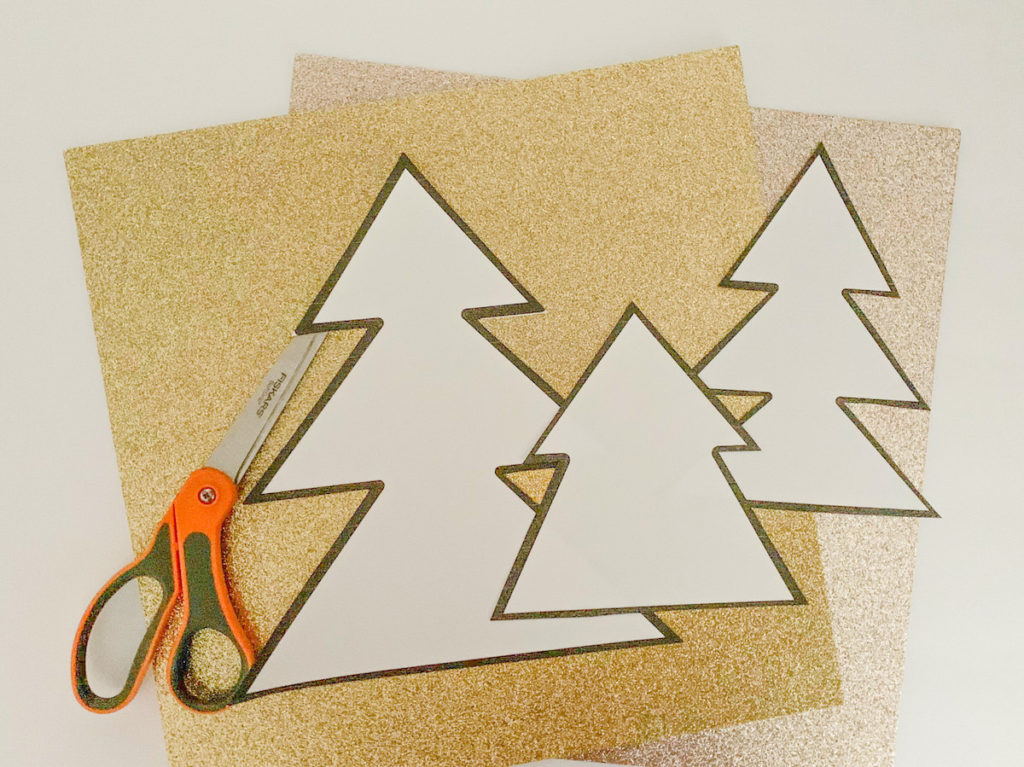
I found this glitter card stock from Hobby Lobby. It was only a dollar per sheet with the 50% off sale on card stock! This project is great because you can choose card stock that will go with your Christmas decor. And easy to change up if you decide to do something different. Since the materials are about a dollar a piece, this is a cheap Christmas DIY that looks great!
Some great places to find individual sheets or card stock are Joann’s, Hobby Lobby, and Michael’s. Look online before you go to see if there are any coupons or sales.
Step 4: Trace the Christmas Tree Outline Template
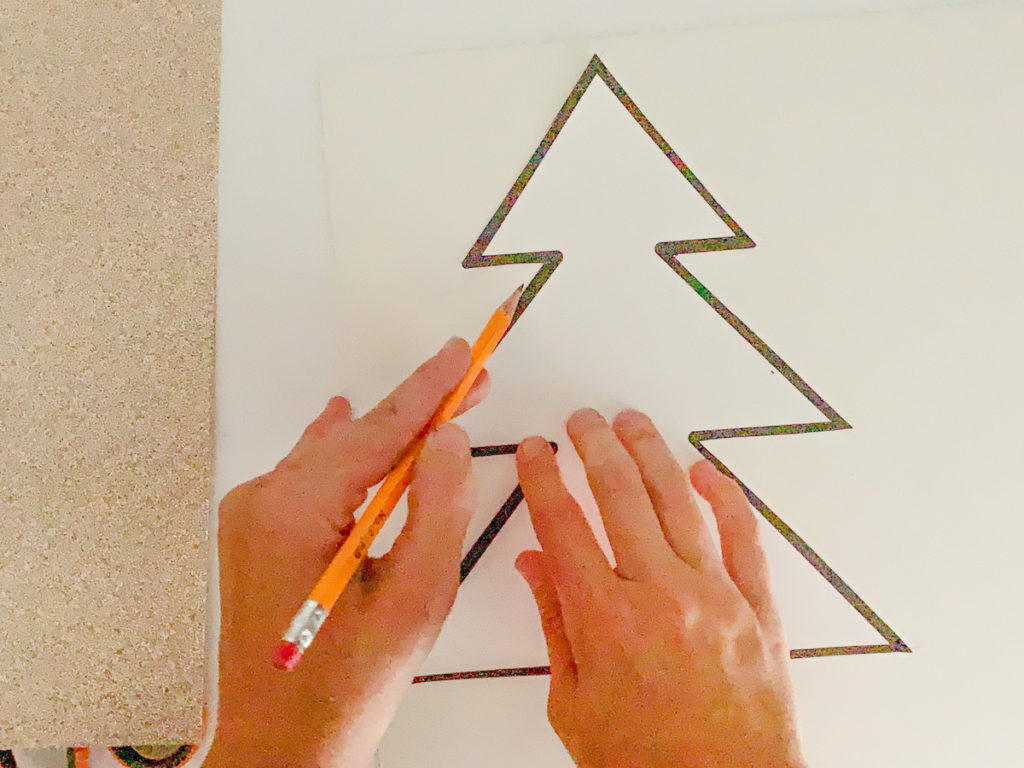
Trace the Christmas tree outline template onto your card stock paper. Then cut out with scissors or an exacto knife.
NOTE: I forgot to take a picture of this, but you will also need to trace and cut out something to cover the back of the tree. I chose to cover the back of my trees with brown craft paper purchased at the Dollar Tree. You could use the same card stock or another sheet of card stock that is complimentary.
Step 5: Trace and Cut Out Christmas Trees on Foam Board
Trace the Christmas tree outline onto foam board. The foam board makes the tree sturdy and allows you to put the tree on a wooden skewer so it can stand up. Thin foam board works great for this project. I purchased my foam board at Dollar Tree. I was able to cut out all 5 of my Christmas trees using one sheet of foam board!
TIP: I like to use a ruler to help keep my line straight when cutting foam board with an exacto knife. You have to make a deep cut into the foam board and it can be easy to mess up the lines!
Step 6: Mod Podge the Christmas Tree Templates Together
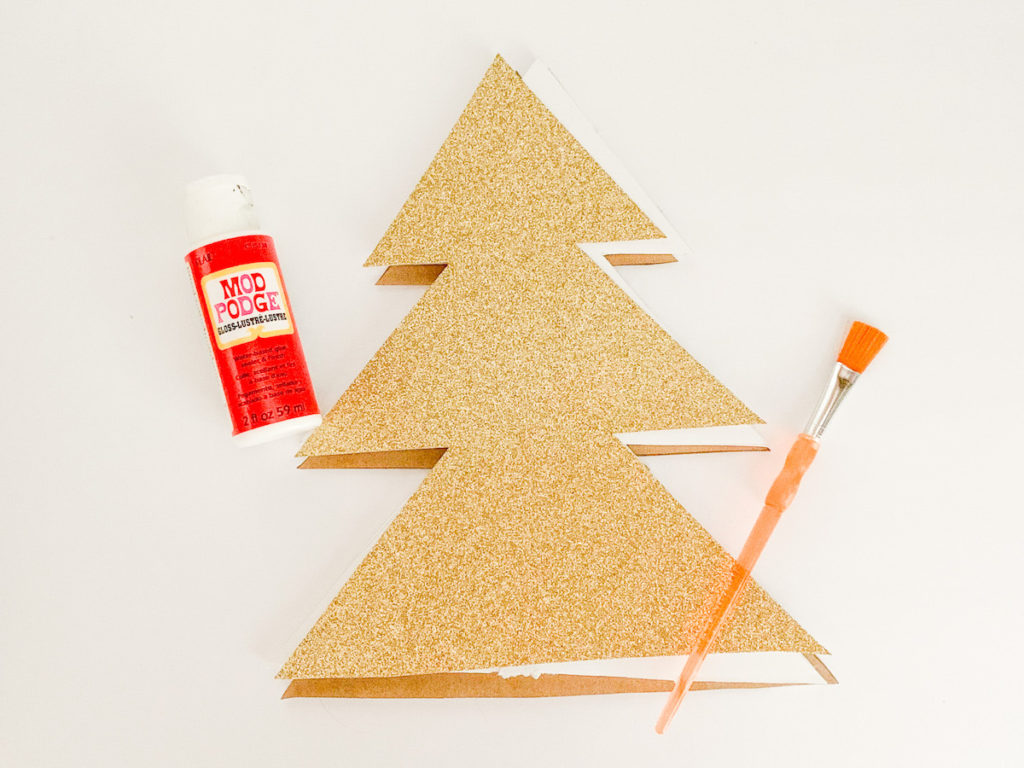
I used Mod Podge to glue the front Christmas tree outline (glitter card stock) and the back Christmas tree outline (brown craft paper) to the foam board. Choose one side to do first. Paint the entire foam board side with Mod Podge then carefully place the Christmas tree outline on top. Wait until the first side dries, at least 15 minutes.
When it is dry, turn the Christmas tree over and glue the back side on following the same steps from above.
Step 7: Paint the Foam Board Edge of the Christmas Tree Outline
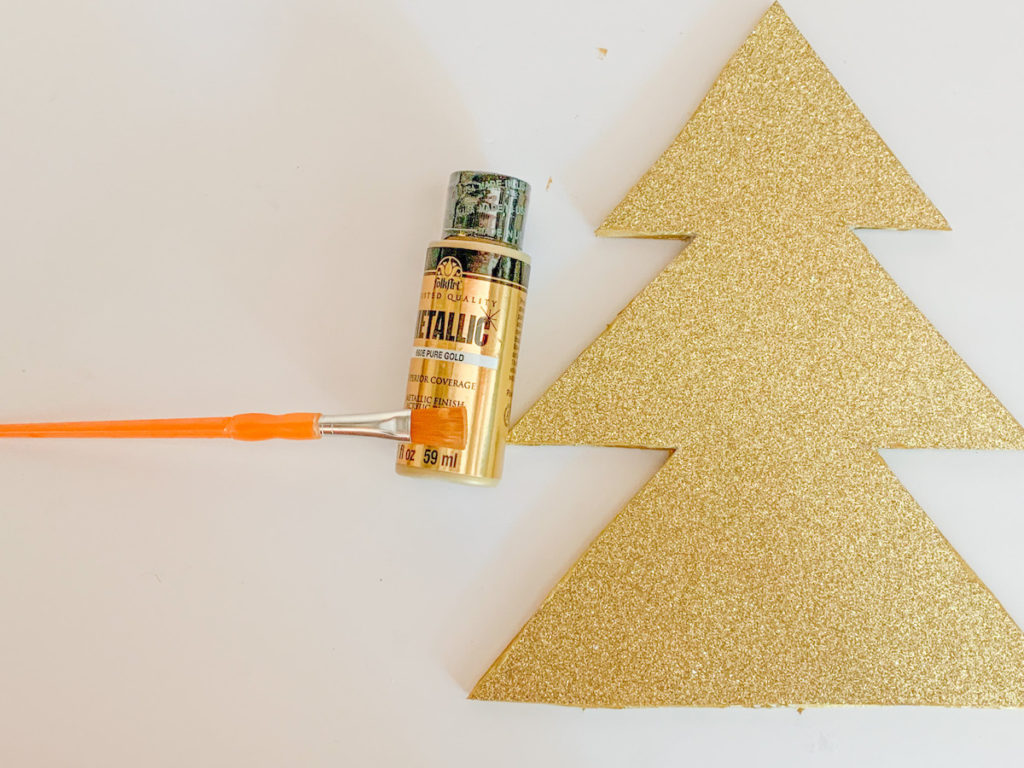
Choose a complimentary paint color or a paint color that is very similar to your card stock paper. I found this pretty metallic gold paint from Folk Art at Walmart. It was just over a dollar!
You will paint the white edge of the Christmas tree to give the tree a clean look.
Let the paint completely dry before moving on to the next step.
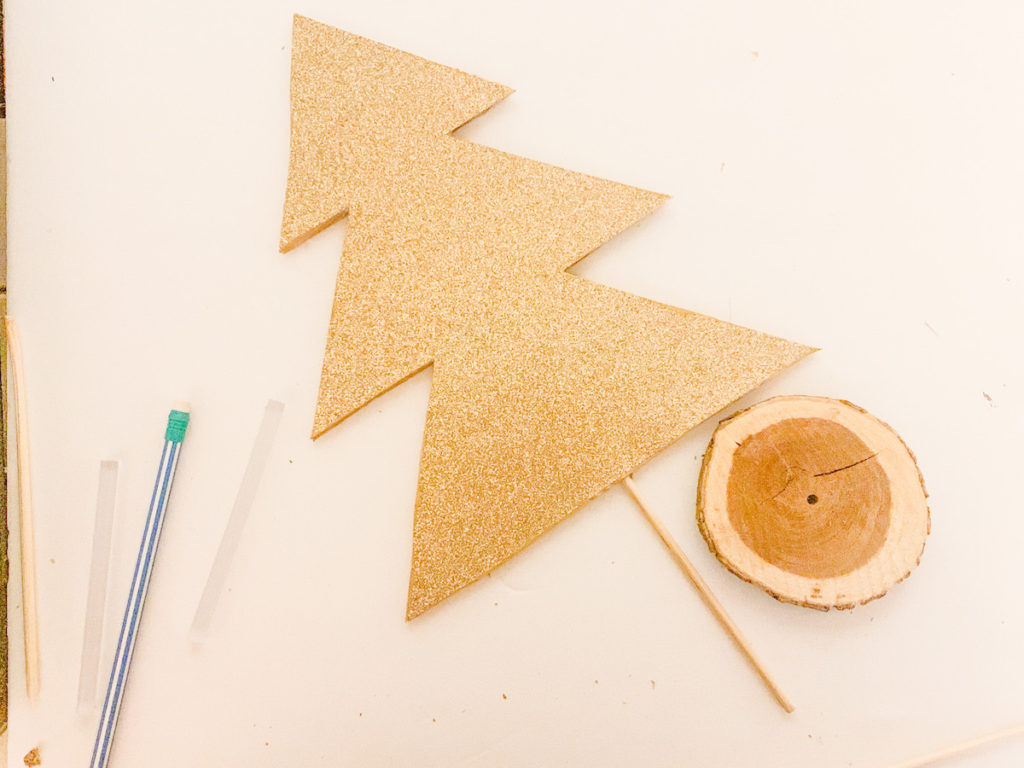
Step 8: Put the Christmas Tree on a Wood Skewer

This can be a little tricky to get your Christmas Tree outline onto a wood skewer.
First, make sure that your Christmas tree is completely dry!
Then take the pointy end of the wood skewer and poke it into the middle of the bottom of the Christmas tree. Push it into the Christmas tree about 2 inches.
Use both hands to guide the wood skewer so that it doesn’t accidentally poke through the Christmas tree.
You can find a pack of wood skewers at Dollar Tree.
Step 9: Trim the Wood Skewer on the Christmas Tree

I used jewelry wire cutters to cut the wood skewer to your desired length. Just remember that you will be putting a half inch of the bottom of the skewer into a wood slice.
Step 10: Drill a Hole for the Wood Slice
I bought my wood slices from Hobby Lobby. Using the 40% off coupon a bag of wood slices were only $2.50.
Drill a hole in the middle of the wood slice the same width as your wood skewers. It should be snug so that the Christmas tree will stand up straight.
TIP: Make sure you drill straight down instead of at an angle. If you drill at a slight angle, the Christmas tree will stand at a slight angle.
Dollar Store Christmas Tree DIY

I love how these Christmas trees turned out! I used rose gold glitter card stock, brown craft paper, and gold glitter cardstock to make these Dollar Tree Christmas trees.
I also created the star garland for the trees by using this Star Template Printable and simple craft string.


Pingback: Adorable Free Heart Printable Templates Stencils – OriginalMOM